Description
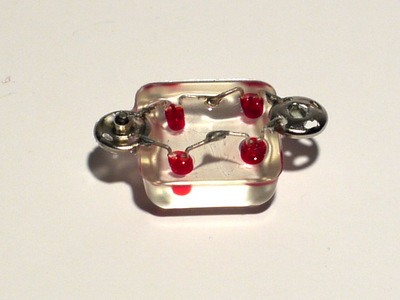
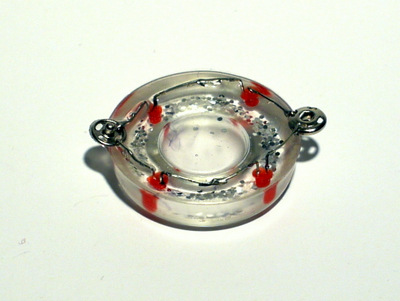
Early resin beads were an attempt to make modular beads that incorporated LEDs in various configurations. Initial investigations used slow cure (24h) jewellery resin with embedded soldered electronic components. No attempt was made to polish or finish the resin once it had cured. LED arrays were made in series and parallel to test the capabilities of the battery. Beads were connected to each other using basic wiring and snap closures, chosen for their ease of use and ability to differentiate between anode and cathode ends. Later iterations also used glitter, added to the resin during the curing phase, to refract light better and make the bead more attractive looking. These designs were paired with early 3D printed battery casings, to create a wearable bracelet design that fully encircled the wrist.
Design and Research Questions
- Can electronics be embedded in resin and still work?
- Is it possible to design/make a modular bead?
- What is the best way to attach a resin bead to an electrical circuit?
Components
- LEDs of various colours and voltages
- Metal snap closures
- Clear jewellery resin
- Glitter
Discussion
Slow cure resin proved inefficient for rapidly producing prototypes. This delayed some investigation into the viability of the modular bead designs and discussion of next steps.
Because LEDs varied in voltage, some burnt out after being connected to rechargeable LiPo batteries. When connected to a 3V coin cell battery, multiple beads would not function due to a lack of power. This restriction was something that required further discussion, as the LightBlue Bean Arduino model (which uses a 3V coin cell battery) had been selected for its functionality and size.